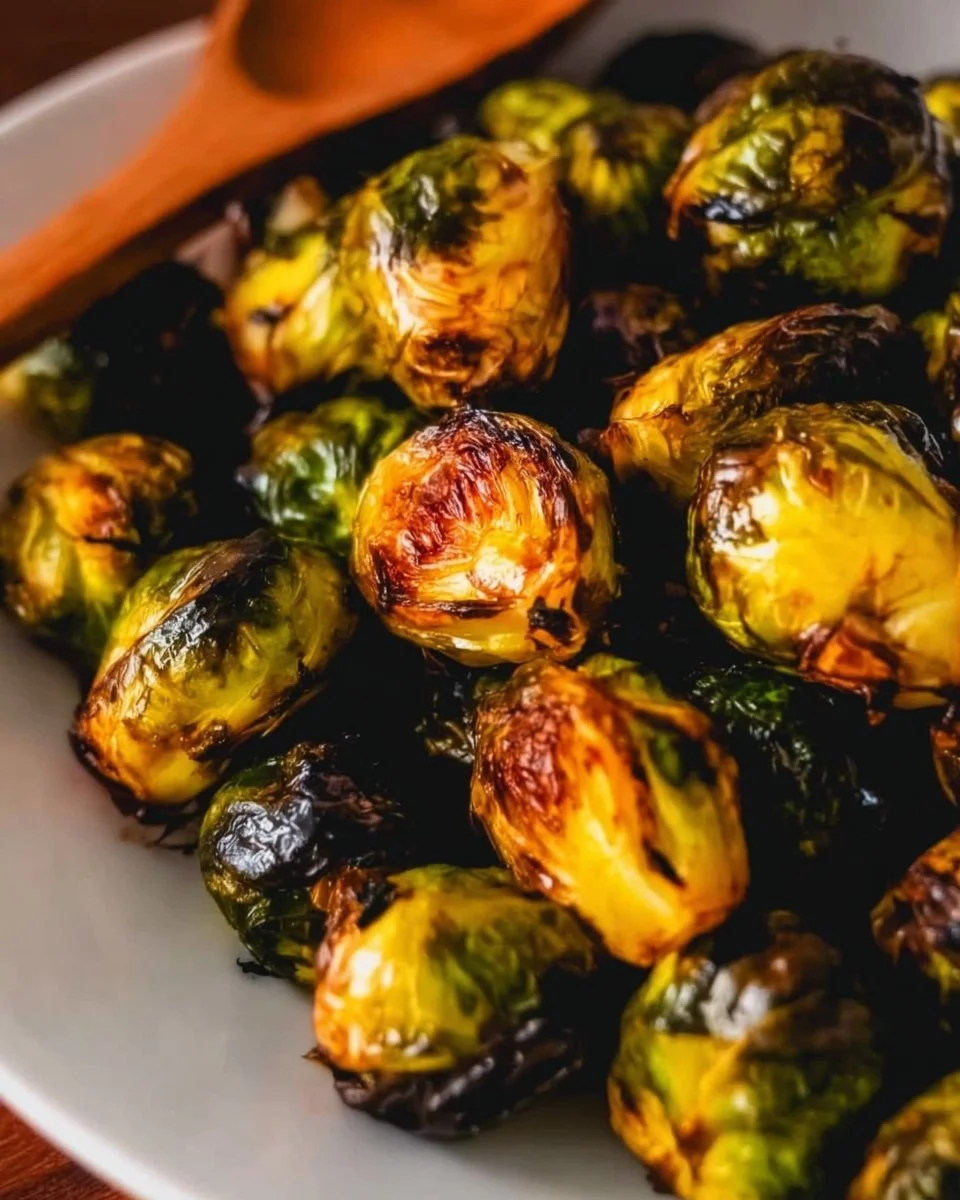
Roasted Brussels Sprouts with Balsamic
why make this recipe
Roasted Brussels Sprouts with Balsamic is a delightful dish that transforms these little green vegetables into a mouthwatering side. Brussels sprouts often get a bad rap, but when cooked properly, they develop a rich flavor and a satisfying texture. Roasting them caramelizes their natural sugars, enhancing their taste and making them crispy on the outside and tender on the inside. The addition of balsamic vinegar adds a sweet and tangy touch that complements the earthy flavor of the sprouts perfectly.
Choosing to make this recipe means you can enjoy a nutritious side dish that is not only tasty but also visually appealing. It’s easy to prepare and can be served in many settings, whether you are hosting a dinner party or enjoying a simple family meal. Plus, it’s a great way to encourage those who might be hesitant to try Brussels sprouts to enjoy them.
Working with fresh ingredients like Brussels sprouts, olive oil, and balsamic vinegar means you’ll have a dish that is not only satisfying but also healthy. This recipe is perfect for vegetarian and vegan diets, making it a versatile option for various dietary preferences.
how to make Roasted Brussels Sprouts with Balsamic
Making Roasted Brussels Sprouts with Balsamic is a simple and straightforward process. This recipe requires only a few ingredients, and the cooking method doesn’t demand much time or effort. Here’s a detailed guide on how to prepare this delicious dish.
Ingredients
- Brussels sprouts
- Balsamic vinegar
- Olive oil
- Salt
- Pepper
- Garlic (optional)
Directions
-
Preheat the oven: Start by preheating your oven to 400°F (200°C). This temperature is ideal for roasting vegetables, allowing them to cook evenly and develop a lovely char.
-
Trim and halve the Brussels sprouts: Rinse the Brussels sprouts under cold water. Remove any yellow or damaged outer leaves, then trim a small amount from the base. Cut each Brussels sprout in half lengthwise to help them cook through and soak in the flavors.
-
Prepare the mixture: In a large bowl, combine the trimmed Brussels sprouts with olive oil, balsamic vinegar, salt, and pepper. If you decide to use garlic, mince it and add it to the bowl. Toss everything together until the Brussels sprouts are well-coated.
-
Spread on a baking sheet: Take a baking sheet and line it with parchment paper or simply spray it with cooking spray. Spread the Brussels sprouts in a single layer on the sheet. This ensures they roast evenly and get crispy.
-
Roast in the oven: Place the baking sheet in the preheated oven. Roast the Brussels sprouts for about 20 to 25 minutes. Stir them halfway through the cooking time for even browning. You’ll know they are done when they are golden brown and tender.
-
Serve warm: Take the Brussels sprouts out of the oven, and serve them warm. They can be enjoyed immediately or can even be made ahead and reheated as needed.
how to serve Roasted Brussels Sprouts with Balsamic
Roasted Brussels Sprouts with Balsamic can be served in various ways. This dish is versatile and pairs well with many main courses. Here are some ideas on how to serve them:
-
As a side dish: These Brussels sprouts make a great side dish for a variety of meats, including chicken, beef, or pork. Their rich flavor adds depth to any meal.
-
Topped with nuts or cheese: For an extra layer of flavor, consider adding toasted nuts, such as walnuts or pecans, on top before serving. Crumbled feta or shaved Parmesan can also elevate this dish, providing a creamy texture.
-
Garnished with herbs: A sprinkle of fresh parsley or chives adds color and freshness to the dish. This makes your Brussels sprouts not only taste great but also look beautiful on the table.
-
In a salad: You can also use roasted Brussels sprouts as a base for a salad. Combine them with mixed greens, dried cranberries, and some nuts for a hearty and healthy dish.
how to store Roasted Brussels Sprouts with Balsamic
If you have leftovers of your delicious roasted Brussels sprouts, it’s important to store them properly to maintain their taste and texture.
-
Refrigeration: Allow the Brussels sprouts to cool completely, then transfer them to an airtight container. They can be stored in the refrigerator for up to 3 to 5 days. When you’re ready to eat them, just reheat in the oven or microwave until warmed through.
-
Freezing: While it’s best to enjoy roasted Brussels sprouts fresh, you can freeze them if necessary. Place the cooled sprouts on a baking sheet in a single layer and freeze until solid. After that, transfer them to a freezer-safe bag or container. They can last in the freezer for about 2 to 3 months. When you’re ready to eat them, it’s best to bake them directly from frozen.
tips to make Roasted Brussels Sprouts with Balsamic
To make the best Roasted Brussels Sprouts with Balsamic, here are some helpful tips:
-
Select fresh sprouts: Choose Brussels sprouts that are firm and bright green. Smaller ones tend to be sweeter, while larger ones can be more bitter.
-
Don’t overcrowd the pan: If you place too many Brussels sprouts on the baking sheet, they may steam rather than roast. Make sure to spread them out so that hot air can circulate around each piece.
-
Adjust the cooking time: Depending on the size of the Brussels sprouts, you might need to adjust the cooking time slightly. Keep an eye on them; they should be golden and fork-tender.
-
Experiment with flavors: Feel free to personalize the recipe by adding other spices or using flavored balsamic vinegar. You could try adding a pinch of red pepper flakes for a bit of heat or a splash of maple syrup for extra sweetness.
-
Mix up your veggies: Consider adding other vegetables to the mix for variety. Carrots, sweet potatoes, or cauliflower can be beautifully roasted alongside Brussels sprouts for a colorful medley.
variation
While the classic Roasted Brussels Sprouts with Balsamic is delicious on its own, there are several variations you might consider trying:
-
Maple Balsamic Brussels Sprouts: For a sweeter take, drizzle real maple syrup along with the balsamic vinegar. This extra sweetness combines perfectly with the earthy flavors.
-
Honey Garlic Brussels Sprouts: Replace the balsamic vinegar with honey and soy sauce for a sticky, sweet flavor.
-
Spicy Roasted Brussels Sprouts: Add chopped chili peppers or a dash of cayenne pepper to give your Brussels sprouts a kick.
-
Cheesy Brussels Sprouts: In the last five minutes of roasting, sprinkle some shredded cheese on top for a melty, indulgent treat.
FAQs
-
Can I use frozen Brussels sprouts for this recipe?
Yes, you can use frozen Brussels sprouts. However, they may not get as crispy as fresh ones. It’s best to thaw them first and pat them dry before roasting. -
How do I know when Brussels sprouts are done?
Brussels sprouts are done when they are tender and a golden brown color. You can test doneness by inserting a fork into the thickest part; it should go through easily. -
Can I prepare Brussels sprouts ahead of time?
Yes, you can prep the Brussels sprouts ahead of time by trimming and halving them. Store them in the refrigerator until you’re ready to toss them with oil and vinegar for roasting. -
What can I serve with Roasted Brussels Sprouts with Balsamic?
These Brussels sprouts pair well with a variety of main dishes, including grilled chicken, pork chops, or fish. They also work great in a vegetable platter or as part of a holiday dinner. -
How do I reheat leftover Roasted Brussels Sprouts?
To reheat, place them in a preheated oven at 350°F (175°C) for about 10-15 minutes or until warmed through. You can also use a microwave, but the oven helps them regain their crispiness.
Roasted Brussels Sprouts with Balsamic is a simple, yet delightful dish that anyone can make at home. With the right technique, you’ll turn a sometimes overlooked vegetable into a tasty side that everyone will love. This recipe is adaptable and perfect for any skill level in the kitchen, making it an excellent addition to any meal. Enjoy your cooking adventure!